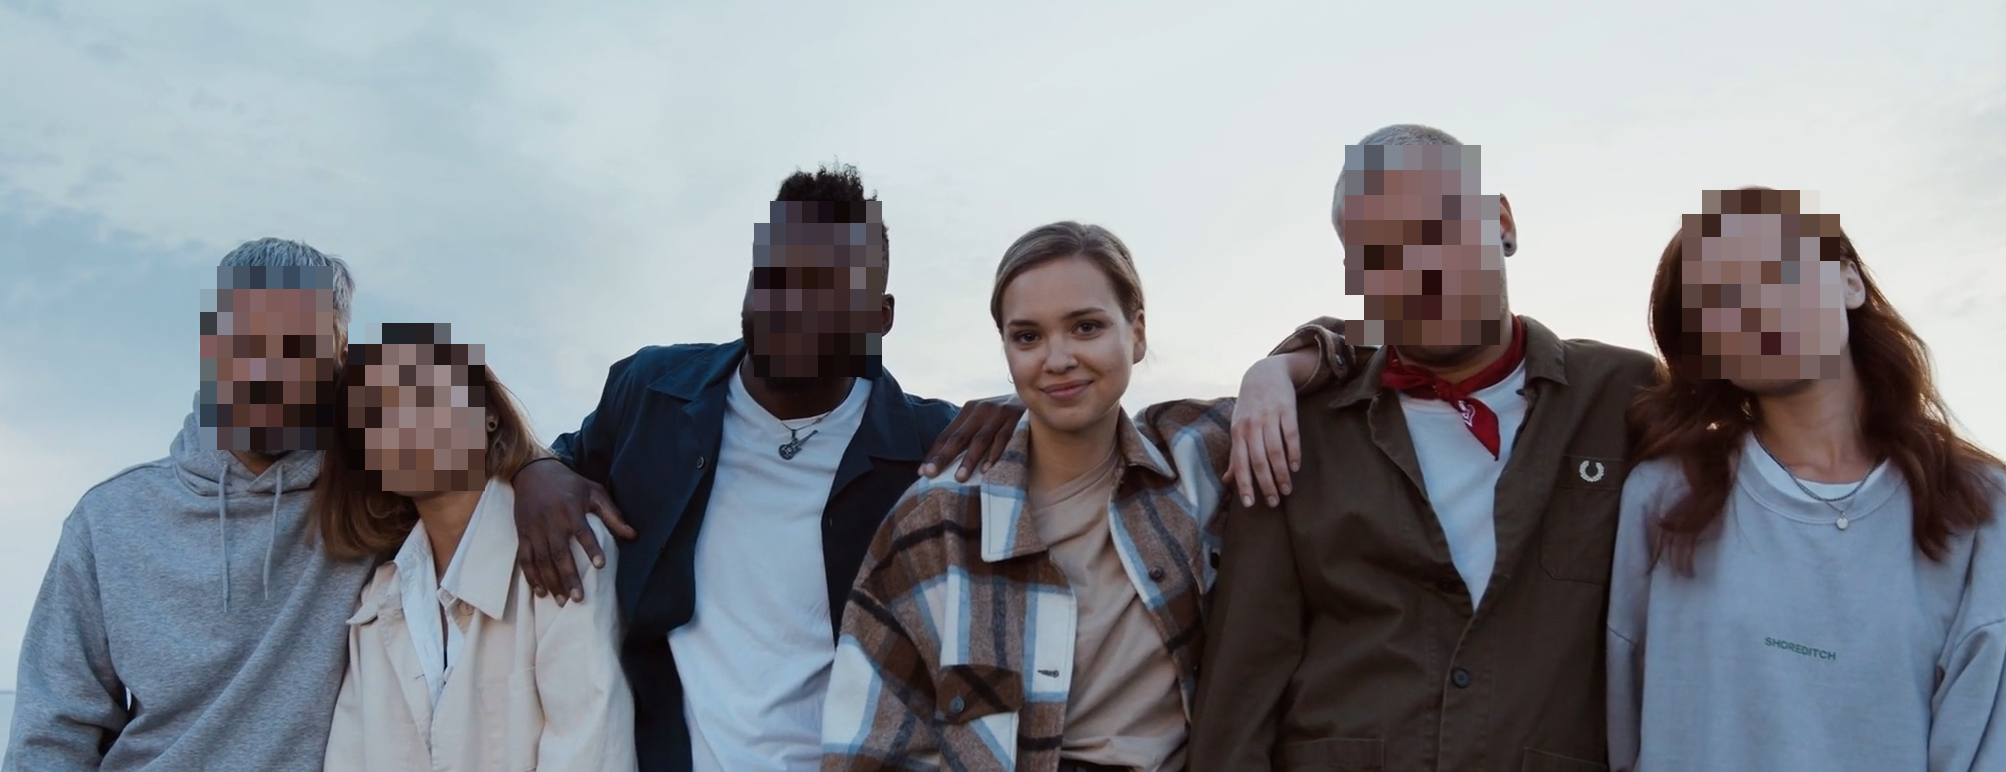
Blur vs Pixelate vs Black Box: Which Protects Privacy Best?
Choosing an anonymization method is not only a design decision. It is a risk decision. If your content can be reshared widely, your method must stay effective after compression, cropping, and reposting.
Short answer: pixelate is the best default for most public posts, black box is strongest for strict privacy, soft blur works best for lower-risk content where the final image still needs to look natural, and AR filters are best for creator style rather than compliance redaction.
Want a creator-style result instead of strict redaction? Open the tracked AR workflow: /en/tools/add-ar-filters-to-video/.
Quick comparison
| Method | Privacy strength | Visual style | Best fit |
|---|---|---|---|
| Blur | Medium to high, depending on intensity | Natural | Lower-risk photos and videos after careful review |
| Pixelate | High | Noticeable but readable | Public posts, recurring workflows, social video |
| Black box | Very high | Most obvious | Compliance, legal, school, medical, or high-risk footage |
| Emoji | Low to medium | Playful | Informal content where strict anonymity is not required |
| AR filters | Low to medium, depending on style | Creator-friendly overlays | Social videos, event clips, privacy avatar effects |
Blur
- Pros: softer visual look, natural style.
- Cons: weak blur can leak identity.
- Best for: lower-risk content with careful review.
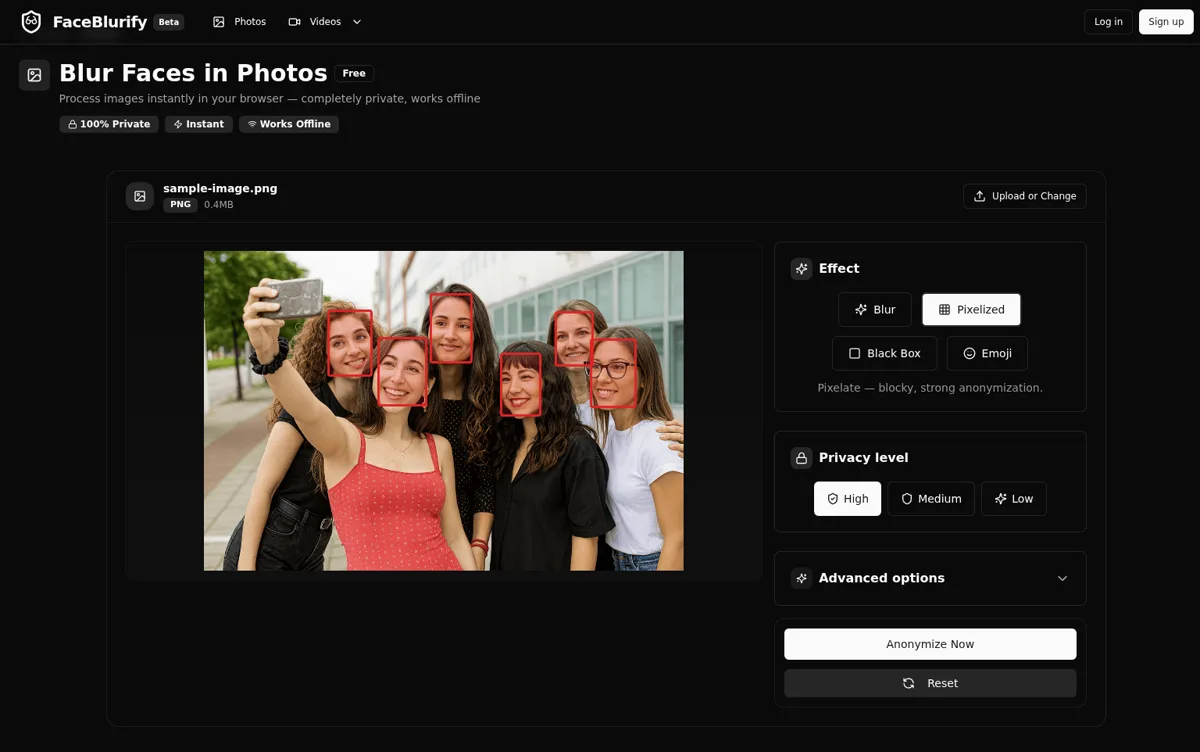
Pixelized
- Pros: strong, practical default for most use cases.
- Cons: more visible than blur.
- Best for: public posting, recurring workflows, privacy-first teams.
Black Box
- Pros: clearest visual signal of anonymization, strong protection.
- Cons: most intrusive appearance.
- Best for: high-risk, compliance-heavy, or legal-sensitive footage.
Emoji
- Pros: friendly and expressive style.
- Cons: not ideal for strict privacy contexts.
- Best for: informal or educational content.
AR filters
- Pros: face-tracked overlays can make videos feel more polished or playful.
- Cons: not a compliance-first anonymization method.
- Best for: creator videos, event clips, and privacy-avatar style coverage.
Decision framework
Pick your method based on three factors:
- Risk level: how harmful would re-identification be?
- Distribution: private share, social media, or public archive?
- Audience tolerance: can your audience accept stronger visual masking?
If risk is unclear, default to stronger protection.
Method by scenario
- Street interviews: Pixelized or Black Box.
- Family/event sharing: Blur or Pixelized depending on audience.
- Corporate/campus publishing: Pixelized as baseline, Black Box for sensitive clips.
- Education demos: Emoji can work if strict anonymity is not required.
- Creator or event clips: AR filters can work when style matters more than strict privacy.
Face-only or full-body?
Effect choice and target choice are separate. You can apply a strong effect to faces only, or to full bodies when needed:
- Face mode: /en/tools/blur-faces-videos/
- Full-body mode: /en/tools/blur-fullbody-videos/
When to use AR filters
Use AR Filters when the video should remain expressive: creator clips, event recaps, team videos, and short social edits. The new AR workflow supports styles such as Sunglasses, Party Glasses, Gold Crown, Privacy Avatar, Mouth Pop, and Neon Visor.
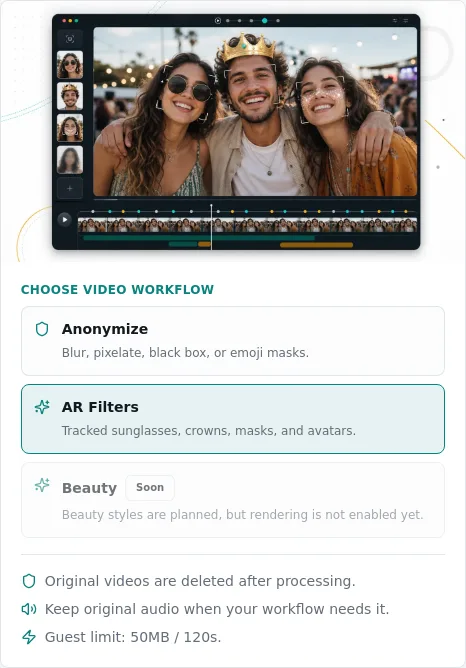
For strict privacy, choose pixelized or black box instead. For the AR workflow, see: Add AR filters to video online.
Related guides
- Best practices for anonymizing videos
- Add AR filters to video online
- Face blur vs full-body anonymization
- Privacy protection workflow guide
FAQ
Which effect is best for most users?
Pixelized is the strongest all-around default for public content.
Is blur enough for legal/compliance use?
Sometimes, but many teams choose stronger effects in high-risk contexts.
Can I change effect after preview?
Yes. Re-run with another effect and compare before exporting.
Does full-body mode replace effect choice?
No. Full-body decides target area. Effect decides visual masking style.