How to Blur Faces Only in Part of a Video (Time-Range Workflow)

Trim the clip, then keep only the right person visible
Use the selective workflow when only part of the video needs anonymization and one identity should stay clear.
Best setup for this workflow
Not every second of a clip needs anonymization. If sensitive people appear only in short windows, a time-range workflow is faster and keeps edits focused.
Use the video tool (selective workflow): /en/tools/blur-faces-videos/
Why trim first
Trimming before analysis gives you:
- Faster processing.
- Cleaner identity grouping.
- Smaller review surface.
Step-by-step
- Upload your clip in video mode.
- Switch to selective workflow.
- Set Start and End time for the sensitive section.
- Analyze selected range.
- Keep or blur identities as needed.
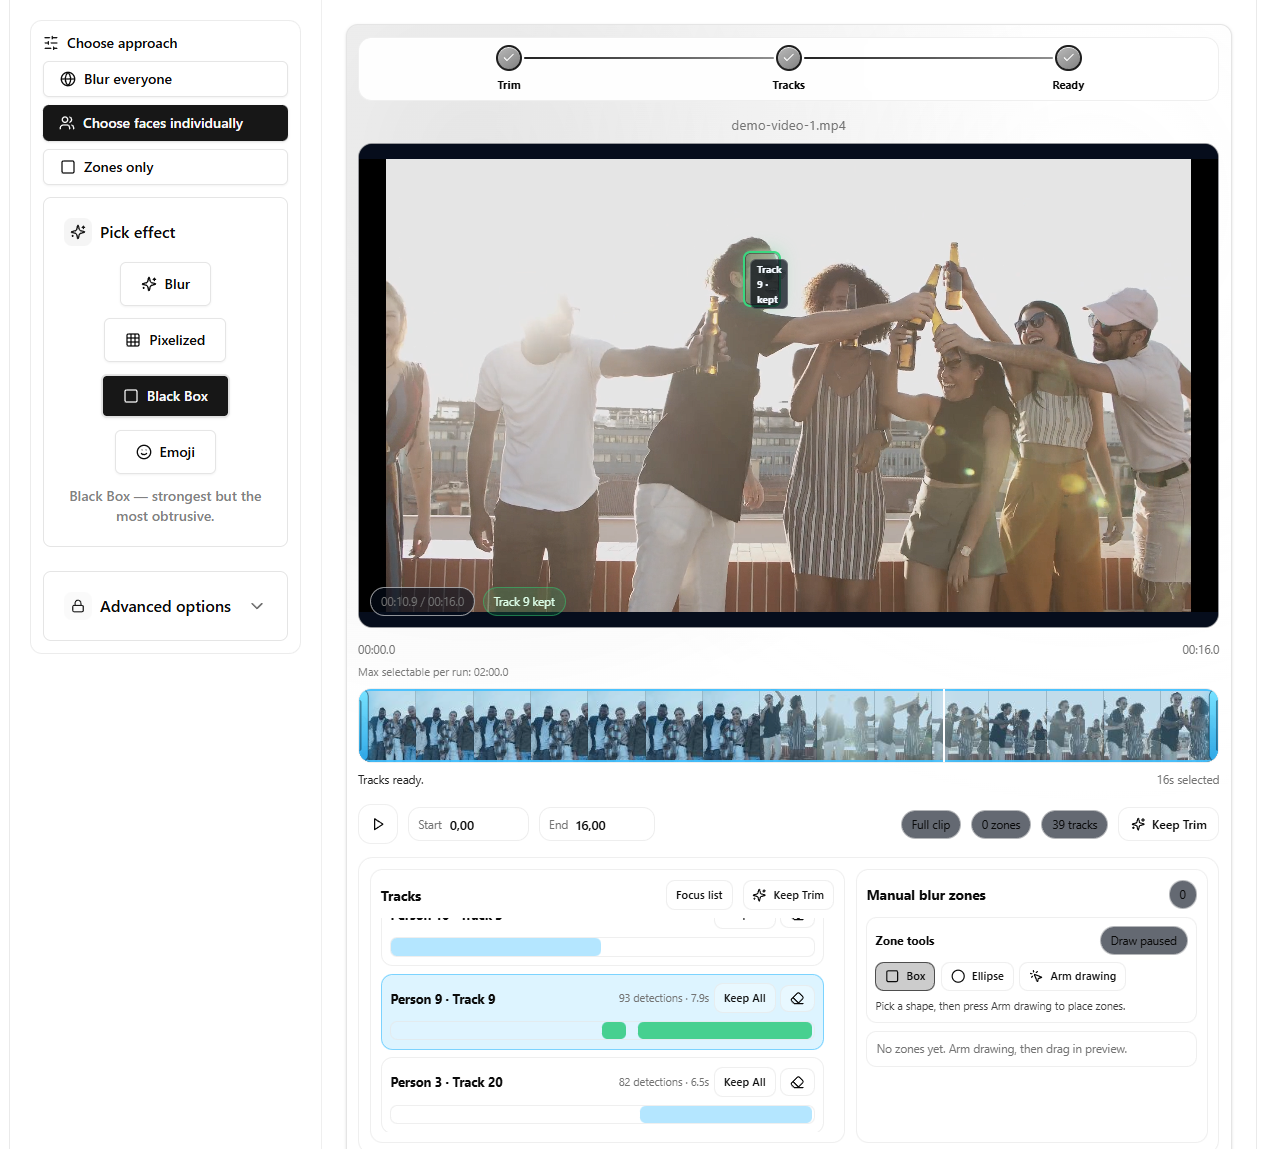
- Apply and review output.
Add a safety margin (important)
Faces often appear 1-2 seconds before you notice them, especially during camera pans and scene cuts. When trimming, add a small margin:
- Start a bit earlier than the sensitive moment.
- End a bit later than the last sensitive frame.
Use cases
- Street scenes with short bystander exposure.
- Vlogs where only intro/outro includes public faces.
- Training clips with one sensitive segment.
Multiple segments workflow
If you have three separate sensitive moments in a long video, it is usually cleaner to process them as three short segments instead of one long trim. You get faster runs and easier review.
Avoid these mistakes
- Analyzing full clip when only 10-20 seconds matter.
- Forgetting that scene transitions near trim boundaries may need extra margin.
- Skipping review of first and last frames in the selected range.
Related guides
- Blur everyone except one person
- License plate redaction workflow
- Detection fixes for difficult clips
FAQ
Can I run multiple trimmed segments separately?
Yes. This is often the cleanest method for long videos.
Does trim reduce output quality?
No by itself. Quality depends on effect choice and encoding settings.
Is this useful for social clips?
Yes. It is ideal when only short moments require anonymization.